|
|
| Zeile 209: |
Zeile 209: |
| | chmod 0777 S97mount | | chmod 0777 S97mount |
| | </pre> | | </pre> |
| | + | |
| | | | |
| | === Webcam === | | === Webcam === |
| − | es gibt grundsätzlich zwei größere Projekte für Webcam-Driver | + | mittlerweile gibt es viele Möglichkeiten eine Webcam zu Betreiben.<br> |
| − | | + | '''[[Webcam-Howto]]''' - ist eine ausführliche Anleitung |
| − | ==== spca5xx/spca5xx_LE ====
| |
| − | * Installation:
| |
| − | :Welches Driver-modul ihr braucht kommt auf Eure Kamera an --> [http://mxhaard.free.fr/spca5xx.html Uebersicht]
| |
| − | | |
| − | <pre>
| |
| − | # spca5xx-Modul
| |
| − | ipkg install http://ping02.stura.uni-weimar.de/dave/kmod-spca5xx_2.4.30+20060501-brcm-1_mipsel.ipk
| |
| − | | |
| − | | |
| − | # spca5xx/LE-Modul
| |
| − | cd /tmp
| |
| − | wget http://ping02.stura.uni-weimar.de/dave/spca5xx_lite.o.gz
| |
| − | mv spca5xx_lite.o.gz /lib/modules/2.4.30
| |
| − | cd /lib/modules/2.4.30/
| |
| − | gunzip spca5xx_lite.o.gz
| |
| − | </pre>
| |
| − | | |
| − | nun noch video-modul und .jpg unterstützung laden
| |
| − | | |
| − | <pre>
| |
| − | ipkg install libpthread
| |
| − | ipkg install kmod-videodev
| |
| − | </pre>
| |
| − | | |
| − | danach Neustart.<br>
| |
| − | Die Module leider nicht beim Neustart selbstständig geladen.
| |
| − | Webcammodule laden mit
| |
| − | | |
| − | <pre>
| |
| − | insmod videodev
| |
| − | insmod spca5xx oder insmod spca5xx_lite
| |
| − | </pre>
| |
| − | | |
| − | mit dem Befehl:
| |
| − | | |
| − | <pre>
| |
| − | lsmod
| |
| − | </pre>
| |
| − | | |
| − | kannst du überprüfen welche module geladen sind. Jetzt noch überprüfen ob die Webcam erkannt wurde indem wir
| |
| − | | |
| − | <pre>
| |
| − | dmesg
| |
| − | </pre>
| |
| − | | |
| − | eigeben. Da sollte dann sowas stehen wie:
| |
| − | [[Bild:Aldicam.png|thumb|Aldi Webcam DC-3110]]
| |
| − | | |
| − | <pre>
| |
| − | root@dave_yakumo:~# dmesg
| |
| − | Creating 5 MTD partitions on "Physically mapped flash":
| |
| − | 0x00000000-0x00040000 : "cfe"
| |
| − | 0x00040000-0x003f0000 : "linux"
| |
| − | 0x000b5fec-0x00180000 : "rootfs"
| |
| − | mtd: partition "rootfs" doesn't start on an erase block boundary -- force read-only
| |
| − | 0x003f0000-0x00400000 : "nvram"
| |
| − | 0x00180000-0x003f0000 : "OpenWrt"
| |
| − | diag boardtype: 0000041a
| |
| − | Probing device eth0: No Robo switch in managed mode found
| |
| − | Probing device eth1: No Robo switch in managed mode found
| |
| − | Probing device eth2: No such device
| |
| − | Probing device eth3: No such device
| |
| − | BFL_ENETADM not set in boardflags. Use force=1 to ignore.
| |
| − | eth2: Broadcom BCM4320 802.11 Wireless Controller 3.90.37.0
| |
| − | usb.c: registered new driver usbdevfs
| |
| − | usb.c: registered new driver hub
| |
| − | usb-ohci.c: USB OHCI at membase 0xb8004000, IRQ 2
| |
| − | usb-ohci.c: usb-00:04.0, PCI device 14e4:4715
| |
| − | usb.c: new USB bus registered, assigned bus number 1
| |
| − | hub.c: USB hub found
| |
| − | hub.c: 2 ports detected
| |
| − | SCSI subsystem driver Revision: 1.00
| |
| − | Initializing USB Mass Storage driver...
| |
| − | usb.c: registered new driver usb-storage
| |
| − | USB Mass Storage support registered.
| |
| − | uhci.c: USB Universal Host Controller Interface driver v1.1
| |
| − | Linux video capture interface: v1.00
| |
| − | usb.c: registered new driver spca5xx
| |
| − | drivers/usb/spca5xx.c: spca5xx driver 00.57.07 registered
| |
| − | hub.c: new USB device 00:04.0-1, assigned address 2
| |
| − | drivers/usb/spca5xx.c: USB SPCA5XX camera found. Qtec Webcam 100 Pac207-BCA
| |
| − | drivers/usb/spca5xx.c: [spca5xx_probe:8380] Camera type GBRG
| |
| − | drivers/usb/pac207.h: [pac207_config:148] Find Sensor PAC207
| |
| − | drivers/usb/spca5xx.c: [spca5xx_getcapability:2207] maxw 352 maxh 288 minw 160 minh 120
| |
| − | </pre>
| |
| − | | |
| − | interessant ist für uns eigentlich nur "Gerät erkannt"
| |
| − | | |
| − | <pre>
| |
| − | usb.c: registered new driver spca5xx
| |
| − | drivers/usb/spca5xx.c: spca5xx driver 00.57.07 registered
| |
| − | hub.c: new USB device 00:04.0-1, assigned address 2
| |
| − | drivers/usb/spca5xx.c: USB SPCA5XX camera found. Qtec Webcam 100 Pac207-BCA
| |
| − | drivers/usb/spca5xx.c: [spca5xx_probe:8380] Camera type GBRG
| |
| − | drivers/usb/pac207.h: [pac207_config:148] Find Sensor PAC207
| |
| − | drivers/usb/spca5xx.c: [spca5xx_getcapability:2207] maxw 352 maxh 288 minw 160 minh 120
| |
| − | </pre>
| |
| − | | |
| − | also Driver gefunden, Webcam erkannt. Und das mit der Aldi-Cam super!
| |
| − | | |
| − | {| {{Prettytable}}
| |
| − | !Programm '''spcacat'''
| |
| − | !Programm '''motion'''
| |
| − | |-
| |
| − | |
| |
| − | Installation:
| |
| − | <pre>
| |
| − | cd /tmp
| |
| − | wget http://ping02.stura.uni-weimar.de/dave/spcacat.gz
| |
| − | mv spcacat.gz /usr/bin
| |
| − | cd /usr/bin
| |
| − | gunzip spcacat.gz
| |
| − | chmod +x spcacat
| |
| − | </pre>
| |
| − | |
| |
| − | Installation:
| |
| − | <pre>
| |
| − | ipkg install http://ping02.stura.uni-weimar.de/dave/libjpeg_6b-1_mipsel.ipk
| |
| − | ipkg install http://ping02.stura.uni-weimar.de/dave/motion_3.2.6-1_mipsel.ipk
| |
| − | </pre>
| |
| − | |-
| |
| − | |
| |
| − | Alle möglichen Einstellungen stehen in der Hilfe
| |
| − | | |
| − | <pre>
| |
| − | spcacat -h
| |
| − | </pre>
| |
| − | | |
| − | <pre>
| |
| − | spcacat [-h -d -g -f -s -p -N -P -o]
| |
| − | -h show this usage message.
| |
| − | -d device ask the driver to use specified video
| |
| − | output device (/dev/video1)
| |
| − | -o outputfile causes the program to output avi with
| |
| − | image data received from the video device to the specified file.
| |
| − | -g grab with READ method instead of default MMAP
| |
| − | -f video format nothing YUV420P fourcc I420
| |
| − | jpg JPEG fourcc MJPG
| |
| − | yuv YUV420P fourcc I420
| |
| − | r16 RGB565 16bits fourcc RGB2
| |
| − | r24 RGB 24bits fourcc RGB3
| |
| − | r32 RGB 32bits fourcc RGB4
| |
| − | -v RAW data fourcc RAWD
| |
| − | -s widthxheight ask the driver for input size
| |
| − | -p X take a picture every X seconds
| |
| − | -p X && -o getPicture every X seconds and record in SpcaPict.jpg
| |
| − | -N take N pictures and stop
| |
| − | -P parport device (spcacat, spcaserv)
| |
| − | </pre>
| |
| − | | |
| − | jetzt Link noch legen, weil das Programm das device ''/dev/v4l/video0'' nicht verarbeiten kann.
| |
| − | und dann spcacat starten.
| |
| − | | |
| − | <pre>
| |
| − | ln -s /dev/v4l/video0 /dev/video0
| |
| − | spcacat -d /dev/video0 -g -f jpg -p 10000 -o > /dev/null &
| |
| − | </pre>
| |
| − | | |
| − | in unserm Falle speichert spcacat aller 10 sek. ein Bild namens ''SpcaPict.jpg'' ab.
| |
| − | | |
| − | Eleganter ist es auch diesmal ein script zu erstellen um nicht jedesmal die Module von Hand zu laden. Dazu legt man in dem Startverzeichnis('''/etc/init.d''') eine Datei z.B. S90webcam an
| |
| − | <pre>
| |
| − | cd /etc/init.d/
| |
| − | vi S90webcam
| |
| − | | |
| − | #!/bin/sh
| |
| − | | |
| − | # Variablen Definition
| |
| − | REAL="/www/bild.jpg"
| |
| − | TEMP="/SpcaPict.jpg"
| |
| − | | |
| − | insmod videodev
| |
| − | insmod spca5xx
| |
| − | sleep 15
| |
| − | | |
| − | # Link legen fuer Vidiodevice
| |
| − | ln -s /dev/v4l/video0 /dev/video0
| |
| − | | |
| − | while true
| |
| − | do
| |
| − | spcacat -d /dev/video0 -g -f jpg -s 320x240 -p 1000 -o > /dev/null &
| |
| − | sleep 2
| |
| − | killall spcacat
| |
| − | killall -9 spcacat
| |
| − | sleep 1
| |
| − | mv $TEMP $REAL
| |
| − | sleep 15
| |
| − | done &
| |
| − | </pre>
| |
| − | | |
| − | berechtigungen noch setzen mit
| |
| − | | |
| − | <pre>
| |
| − | chmod 0777 S90webcam
| |
| − | </pre>
| |
| − | | |
| − | |
| |
| − | Nun noch die Config-Datei für motion anlegen.
| |
| − | <pre>
| |
| − | vi /etc/motion.conf
| |
| − | | |
| − | #motion.conf
| |
| − | | |
| − | daemon on
| |
| − | quiet on
| |
| − | | |
| − | # You may very well need to change this (check with 'dmesg'
| |
| − | # after plugging in your webcam)
| |
| − | videodevice /dev/v4l/video0
| |
| − | | |
| − | # Image size in pixels (valid range is camera dependent)
| |
| − | width 320
| |
| − | height 240
| |
| − | | |
| − | quality 60
| |
| − | framerate 1
| |
| − | auto_brightness on
| |
| − | | |
| − | # Initial brightness, contrast, hue (NTSC), and saturation
| |
| − | # 0 = disabled (valid range 0-255)
| |
| − | brightness 0
| |
| − | contrast 0
| |
| − | saturation 0
| |
| − | hue 0
| |
| − | | |
| − | # Target base directory for pictures and films
| |
| − | # You should probably change this (create dir beforehand)
| |
| − | target_dir /tmp
| |
| − | jpeg_filename bild
| |
| − | | |
| − | # Define a port number (e.g. 8000) to enable the mini-http server
| |
| − | # 0 = disabled
| |
| − | webcam_port 8000
| |
| − | | |
| − | # Set to 'off' to allow anybody (not just localhost) to view the
| |
| − | # webcam via the mini-http server (http://hostname:port)
| |
| − | webcam_localhost off
| |
| − | | |
| − | webcam_quality 40
| |
| − | webcam_maxrate 2
| |
| − | | |
| − | # User defined text overlayed on each in the lower left corner
| |
| − | text_left "Dave TV"
| |
| − | </pre>
| |
| − | | |
| − | Und jetzt motion starten mit
| |
| − | | |
| − | <pre>
| |
| − | motion
| |
| − | </pre>
| |
| − | | |
| − | Jetzt kann man sich den Stream unter http://IP-Adresse_vom_Router:8000 ansehen
| |
| − | | |
| − | Eleganter ist es auch diesmal ein script zu erstellen um nicht jedesmal die Module von Hand zu laden. Dazu legt man in dem Startverzeichnis('''/etc/init.d''') eine Datei z.B. S90webcam an
| |
| − | | |
| − | <pre>
| |
| − | cd /etc/init.d/
| |
| − | vi S90webcam
| |
| − | | |
| − | #!/bin/sh
| |
| − | | |
| − | # Module laden
| |
| − | insmod videodev
| |
| − | insmod spca5xx
| |
| − | sleep 15
| |
| − |
| |
| − | # Link legen fuer Vidiodevice
| |
| − | ln -s /tmp/bild.jpg /www/bild.jpg
| |
| − |
| |
| − | # motion starten
| |
| − | while true
| |
| − | do
| |
| − | motion
| |
| − | sleep 900
| |
| − | killall motion
| |
| − | killall -9 motion
| |
| − | sleep 2
| |
| − | done &
| |
| − | </pre>
| |
| − | | |
| − | berechtigungen noch setzen mit
| |
| − | | |
| − | <pre>
| |
| − | chmod 0777 S90webcam
| |
| − | </pre>
| |
| − | | |
| − | |}
| |
| − | * Projektseiten:
| |
| − | ** [http://mxhaard.free.fr/index.html http://mxhaard.free.fr/index.html] - spca5xx Driver und Viewer
| |
| − | ** [http://www.lavrsen.dk/twiki/bin/view/Motion/WebHome http://www.lavrsen.dk/twiki/bin/view/Motion/WebHome] - Motion Wiki
| |
| − | | |
| − | ==== pwc/pwcx ====
| |
| − | | |
| − | <pre>
| |
| − | ipkg install http://141.54.160.25/dave/philips-webcam_0.2_mipsel.ipk
| |
| − | </pre>
| |
| − | | |
| − | es wird automatisch ein startscript '''/etc/init.d/S90webcam''' angelegt.
| |
| − | | |
| − | <pre>
| |
| − | cd /etc/init.d/
| |
| − | vi S90webcam
| |
| − | </pre>
| |
| − | | |
| − | <pre>
| |
| − | #!/bin/sh
| |
| − | | |
| − | # unload drivers in case the were loaded
| |
| − | killall camsrv; rmmod pwcx; rmmod pwc; rmmod videodev
| |
| − | | |
| − | # load webcam driver modules (it can be assumed that the USB drivers are compiled into the kernel or were installed & autoloaded)
| |
| − | insmod videodev || exit 1
| |
| − | insmod pwc || exit 2
| |
| − | insmod pwcx || exit 3
| |
| − | | |
| − | sleep 1
| |
| − | | |
| − | # check if video device was allocated
| |
| − | if [ ! -e /dev/v4l/video0 ]; then exit 4; fi
| |
| | | | |
| − | # motion starten
| |
| − | motion
| |
| − | </pre>
| |
| | | | |
| − | * Projektseiten:
| |
| − | ** [http://www.saillard.org/linux/pwc/ http://www.saillard.org/linux/pwc/]
| |
| − | ** [http://www.smcc.demon.nl/webcam/ http://www.smcc.demon.nl/webcam/]
| |
| | | | |
| | === IDE-Festplatte oder IDE-Adapter mit CF-card=== | | === IDE-Festplatte oder IDE-Adapter mit CF-card=== |
für alle Geräte
Accounting Statistik
Nette Erweiterungen für die öffentliche Oberfläche.
- sinnvoll für DSL-Anbieter
- es wird das datenvolumen jeder ip-adresse angezeigt, die über den router geleitet wird
- Installation --> Hier
OpenDC-Hub / DirectConnect-Hub
- Eine andere nette Sache ist ein OpenDC-Hub. Damit stellt man einen Server zur Verfuegung,
mit dem sich dann Direct-Connect-Clienten verbinden koennen.
Ziel: Chat & einfache Dateifreigaben (nur weimarnetz-intern).
mails versenden vom linksys - ssmtp
- ganz sinnvoll um textdateien / alarm-emails per script loszuwerden
ipkg update
ipkg install http://openwrt.alphacore.net/ssmtp_2.61_mipsel.ipk
ipkg install libssl

datei: /etc/ssmtp/ssmtp.conf erstellen
root=cstorch(add)gmx(dot)net
mailhub=mail.gmx.net
rewriteDomain=gmx.net

datei /etc/ssmtp/revaliases erstellen
root:cstorch(add)gmx(dot)net:mail.gmx.net
aufruf mit: more ssmtp.conf | ssmtp -aucstorch@gmx.net -ap"passwort" cstorch(add)gmx(dot)net
dabei wird der inhalt von ssmtp.conf als text verschickt
WRT-Openvpn
WRT-Wiki
So gesehen ist euer Router ein "kleiner" Server, auf dem Du z.B. ein "Mini-Wiki" laufen lassen kannst.
- einfach unter Verwalten --> Publizieren die Datei hochladen
- danach kann man Text verändern, andere Bilder hochladen und sich z.b. eine Nachrichtenbox anlegen wo andere euch was reinschreiben können.
- Datei --> Datei:Startseite-mit-wiki.tar
- Hilfreich zum editieren für Windows-User ist das Progrämmchen winscp.
- hierdurch wird die Verzeichnisstruktur eures Linuxsystems vom Router übersetzt in eine Art Windowsexplorer.
MDNS - MulticastDNS
Topologie Plugin
- ahnlich wie OLSR-Viz aber mit verschiebaren Nodes
- Installation:
ipkg install http://141.54.160.25/dave/freifunk-topology-de_1.4.1_mipsel.ipk
Dienste Plugin
damit man unter Dienste auch was sieht muss noch ein Paket nachinstalliert werden.
ipkg update
ipkg install freifunk-olsrd-libs
selbst einen Dienst ankündigen mit
nvram set ff_service="http://104.63.XXX.X|tcp|Beispielserver"
nvram commit
reboot
für Geräte mit USB-Anschluss
- bei den Geräten Asus wl hdd 2,5 / Yakumo wireless storage 60 ist ein usb1.1 vorhanden,
- bei Siemens se505 nachrüstbar Howto
USB
Grundpakete installieren (Driver)
ipkg install kmod-usb-ohci
ipkg install kmod-usb2 (nicht nötig bei USB1.1)
willst du Usbstick oder Usbfestplatte anschließen
ipkg install kmod-usb-storage
ipkg install kmod-vfat
willst du Scanner und Drucker über das Netzwerk nutzen
ipkg install kmod-usb-scanner
ipkg install kmod-usb-printer
danach Neustart.
Die Module werden beim Neustart selbstständig geladen(wenn es kmod-module sind!), und stehen in der Datei /etc/modules.d.
mit dem Befehl:
lsmod
kannst du überprüfen welche module geladen sind. Jetzt noch überprüfen ob das Usb-Gerät erkannt wurde indem wir
dmesg
eigeben. Da sollte dann sowas stehen wie:
root@dave_yakumo:~# dmesg
Creating 5 MTD partitions on "Physically mapped flash":
0x00000000-0x00040000 : "cfe"
0x00040000-0x003f0000 : "linux"
0x000b5fec-0x00180000 : "rootfs"
mtd: partition "rootfs" doesn't start on an erase block boundary -- force read-only
0x003f0000-0x00400000 : "nvram"
0x00180000-0x003f0000 : "OpenWrt"
diag boardtype: 0000041a
Probing device eth0: No Robo switch in managed mode found
Probing device eth1: No Robo switch in managed mode found
Probing device eth2: No such device
Probing device eth3: No such device
BFL_ENETADM not set in boardflags. Use force=1 to ignore.
eth2: Broadcom BCM4320 802.11 Wireless Controller 3.90.37.0
usb.c: registered new driver usbdevfs
usb.c: registered new driver hub
usb-ohci.c: USB OHCI at membase 0xb8004000, IRQ 2
usb-ohci.c: usb-00:04.0, PCI device 14e4:4715
usb.c: new USB bus registered, assigned bus number 1
hub.c: USB hub found
hub.c: 2 ports detected
SCSI subsystem driver Revision: 1.00
hub.c: new USB device 00:04.0-1, assigned address 2
usb.c: USB device 2 (vend/prod 0x126f/0x1325) is not claimed by any active driver.
Initializing USB Mass Storage driver...
usb.c: registered new driver usb-storage
scsi0 : SCSI emulation for USB Mass Storage devices
  Vendor: USB 2.0   Model: Mobile Disk       Rev:
  Type:   Direct-Access                      ANSI SCSI revision: 02
Attached scsi removable disk sda at scsi0, channel 0, id 0, lun 0
SCSI device sda: 253952 512-byte hdwr sectors (130 MB)
sda: Write Protect is off
WARNING: USB Mass Storage data integrity not assured
USB Mass Storage device found at 2
USB Mass Storage support registered.
interessant ist für uns eigentlich nur "Gerät erkannt"
Attached scsi removable disk sda at scsi0, channel 0, id 0, lun 0
SCSI device sda: 253952 512-byte hdwr sectors (130 MB)
sda: Write Protect is off
WARNING: USB Mass Storage data integrity not assured
USB Mass Storage device found at 2
USB Mass Storage support registered.
na dann nur Mountpunkt anlegen und dann noch mounten (einhängen)
mkdir -p /mnt
mount /dev/scsi/host0/bus0/target0/lun0/part1 /mnt
Eleganter ist es ein script zu erstellen um nicht jedesmal den mount-Befehl nach einem Neustart eingeben zu müssen. Dazu legt man in dem Startverzeichnis(/etc/init.d) eine Datei z.B. S97mount an
cd /etc/init.d/
vi S97mount

#!/bin/sh
#
# mount script
#

# Welches device soll gemountet werden?
MOUNT_DEVICE0=/dev/scsi/host0/bus0/target0/lun0/part1

i=0
# Wait 15 secs, mount when ready, and continue if it dosnt get ready within 15 secs.
while [ $i -le 15 ]
do

if [ -e $MOUNT_DEVICE0 ]
then
mount $MOUNT_DEVICE0 /mnt
logger "Erfolgreich eingehaengt: $MOUNT_DEVICE0"
exit 0
fi

sleep 1
i=`expr $i + 1`
done
berechtigungen noch setzen mit
chmod 0777 S97mount
Webcam
mittlerweile gibt es viele Möglichkeiten eine Webcam zu Betreiben.
Webcam-Howto - ist eine ausführliche Anleitung
IDE-Festplatte oder IDE-Adapter mit CF-card
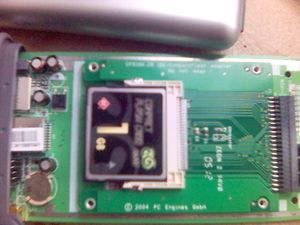
auch das ist möglich: CF-Karte mit Adapter auf IDE
Grundpakete installieren
ipkg install kmod-ide
ipkg install kmod-ext2 oder ipkg install kmod-ext3 oder ipkg install kmod-vfat
danach Neustart.
Die Module werden beim Neustart selbstständig geladen
na dann nur Mountpunkt anlegen und dann noch mounten (einhängen)
mkdir /mnt/hda
mount /dev/ide/host0/bus0/target0/lun0/part1 /mnt/hda
FTP-Server
ipkg install vsftpd
Samba-Server
ipkg install samba-server

