Extra Software für den Router: Unterschied zwischen den Versionen
| Zeile 373: | Zeile 373: | ||
while true | while true | ||
| − | + | do | |
| − | + | spcacat -d /dev/video0 -g -f jpg -s 320x240 -p 1000 -o > /dev/null & | |
| − | + | sleep 5 | |
| − | + | killall spcacat | |
| − | + | killall -9 spcacat | |
| − | + | sleep 2 | |
| − | + | mv $TEMP $REAL | |
| − | + | sleep 15 | |
done & | done & | ||
</pre> | </pre> | ||
Version vom 25. Februar 2007, 21:25 Uhr
Zusätzliche Software
für alle Geräte
Accounting Statistik
Nette Erweiterungen für die öffentliche Oberfläche.
- sinnvoll für DSL-Anbieter
- es wird das datenvolumen jeder ip-adresse angezeigt, die über den router geleitet wird
- Installation --> Hier
OpenDC-Hub / DirectConnect-Hub
- Eine andere nette Sache ist ein OpenDC-Hub. Damit stellt man einen Server zur Verfuegung,
mit dem sich dann Direct-Connect-Clienten verbinden koennen.
Ziel: Chat & einfache Dateifreigaben (nur weimarnetz-intern).
- Mehr dazu unter DirectConnect
mails versenden vom linksys - ssmtp
- ganz sinnvoll um textdateien / alarm-emails per script loszuwerden
- ipkg update
- ipkg install http://openwrt.alphacore.net/ssmtp_2.61_mipsel.ipk
- ipkg install libssl
- datei: /etc/ssmtp/ssmtp.conf erstellen
- root=cstorch(add)gmx(dot)net
- mailhub=mail.gmx.net
- rewriteDomain=gmx.net
- datei /etc/ssmtp/revaliases erstellen
- root:cstorch(add)gmx(dot)net:mail.gmx.net
- aufruf mit : more ssmtp.conf | ssmtp -aucstorch@gmx.net -ap"passwort" cstorch(add)gmx(dot)net
- dabei wird der inhalt von ssmtp.conf als text verschickt
WRT-Openvpn
- Informationen zum FreifunkVPN
- allgemeine Informationen zur FreifunkFirmware (FFF) und openvpn
- konkrete Installationsanleitung zu openVPN unter FFF
WRT-Wiki
So gesehen ist euer Router ein "kleiner" Server, auf dem Du z.B. ein "Mini-Wiki" laufen lassen kannst.
- einfach unter Verwalten --> Publizieren die Datei hochladen
- danach kann man Text verändern, andere Bilder hochladen und sich z.b. eine Nachrichtenbox anlegen wo andere euch was reinschreiben können.
- Datei --> Datei:Startseite-mit-wiki.tar
- Hilfreich zum editieren für Windows-User ist das Progrämmchen winscp.
- hierdurch wird die Verzeichnisstruktur eures Linuxsystems vom Router übersetzt in eine Art Windowsexplorer.
MDNS - MulticastDNS
- mehr dazu unter MDNS mit Freifunk oder in der Wikipedia
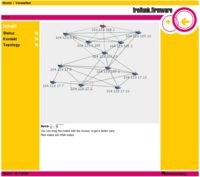
Topologie Plugin
- ahnlich wie OLSR-Viz aber mit verschiebaren Nodes
- Installation:
ipkg install http://141.54.160.25/dave/freifunk-topology-de_1.4.1_mipsel.ipk
für Geräte mit USB-Anschluss
- bei den Geräten Asus wl hdd 2,5 / Yakumo wireless storage 60 ist ein usb1.1 vorhanden,
- bei Siemens se505 nachrüstbar Howto
USB
Grundpakete installieren (Driver)
ipkg install kmod-usb-ohci
ipkg install kmod-usb2
ipkg install kmod-usb-storage
willst du Scanner und Drucker über das Netzwerk nutzen
ipkg install kmod-usb-scanner
ipkg install kmod-usb-printer
danach Neustart.
Die Module werden beim Neustart selbstständig geladen(wenn es kmod-module sind!), und stehen in der Datei /etc/modules.d. mit dem Befehl:
lsmod
kannst du überprüfen welche module geladen sind. Jetzt noch überprüfen ob das Usb-Gerät erkannt wurde indem wir
dmesg
eigeben. Da sollte dann sowas stehen wie:
root@dave_yakumo:~# dmesg
Creating 5 MTD partitions on "Physically mapped flash":
0x00000000-0x00040000 : "cfe"
0x00040000-0x003f0000 : "linux"
0x000b5fec-0x00180000 : "rootfs"
mtd: partition "rootfs" doesn't start on an erase block boundary -- force read-only
0x003f0000-0x00400000 : "nvram"
0x00180000-0x003f0000 : "OpenWrt"
diag boardtype: 0000041a
Probing device eth0: No Robo switch in managed mode found
Probing device eth1: No Robo switch in managed mode found
Probing device eth2: No such device
Probing device eth3: No such device
BFL_ENETADM not set in boardflags. Use force=1 to ignore.
eth2: Broadcom BCM4320 802.11 Wireless Controller 3.90.37.0
usb.c: registered new driver usbdevfs
usb.c: registered new driver hub
usb-ohci.c: USB OHCI at membase 0xb8004000, IRQ 2
usb-ohci.c: usb-00:04.0, PCI device 14e4:4715
usb.c: new USB bus registered, assigned bus number 1
hub.c: USB hub found
hub.c: 2 ports detected
SCSI subsystem driver Revision: 1.00
hub.c: new USB device 00:04.0-1, assigned address 2
usb.c: USB device 2 (vend/prod 0x126f/0x1325) is not claimed by any active driver.
Initializing USB Mass Storage driver...
usb.c: registered new driver usb-storage
scsi0 : SCSI emulation for USB Mass Storage devices
  Vendor: USB 2.0   Model: Mobile Disk       Rev:
  Type:   Direct-Access                      ANSI SCSI revision: 02
Attached scsi removable disk sda at scsi0, channel 0, id 0, lun 0
SCSI device sda: 253952 512-byte hdwr sectors (130 MB)
sda: Write Protect is off
WARNING: USB Mass Storage data integrity not assured
USB Mass Storage device found at 2
USB Mass Storage support registered.
interessant ist für uns eigentlich nur "Gerät erkannt"
Attached scsi removable disk sda at scsi0, channel 0, id 0, lun 0
SCSI device sda: 253952 512-byte hdwr sectors (130 MB)
sda: Write Protect is off
WARNING: USB Mass Storage data integrity not assured
USB Mass Storage device found at 2
USB Mass Storage support registered.
jetzt noch die Dateisystemunterstützung laden
ipkg install kmod-vfat
danach Neustart.
na dann nur Mountpunkt anlegen und dann noch mounten (einhängen)
mkdir -p /mnt
mount /dev/scsi/host0/bus0/target0/lun0/part1 /mnt
Eleganter ist es ein script zu erstellen um nicht jedesmal den mount-Befehl nach einem Neustart eingeben zu müssen. Dazu legt man in dem Startverzeichnis(/etc/init.d) eine Datei z.B. S97mount an
cd /etc/init.d/
vi S97mount

#!/bin/sh
#
# mount script
#

# Welches device soll gemountet werden?
MOUNT_DEVICE0=/dev/scsi/host0/bus0/target0/lun0/part1

i=0
# Wait 15 secs, mount when ready, and continue if it dosnt get ready within 15 secs.
while [ $i -le 15 ]
do

if [ -e $MOUNT_DEVICE0 ]
then
mount $MOUNT_DEVICE0 /mnt
logger "Erfolgreich eingehaengt: $MOUNT_DEVICE0"
exit 0
fi

sleep 1
i=`expr $i + 1`
done
berechtigungen noch setzen mit
chmod 0777 S97mount
Webcam
es gibt grundsätzlich zwei größere Projekte für Webcam-Driver
spca5xx/spca5xx_LE
- Installation:
- Welches Driver-modul ihr braucht kommt auf Eure Kamera an --> Uebersicht
# spca5xx-Modul
ipkg install http://ping02.stura.uni-weimar.de/dave/kmod-spca5xx_2.4.30+20060501-brcm-1_mipsel.ipk


# spca5xx/LE-Modul
cd /tmp
wget http://ping02.stura.uni-weimar.de/dave/spca5xx_lite.o.gz
mv spca5xx_lite.o.gz /lib/modules/2.4.30
cd /lib/modules/2.4.30/
gunzip spca5xx_lite.o.gz
nun noch video-modul und .jpg unterstützung laden
ipkg install libpthread
ipkg install kmod-videodev
danach Neustart.
Die Module leider nicht beim Neustart selbstständig geladen.
Webcammodule laden mit
insmod videodev
insmod spca5xx oder insmod spca5xx_lite
mit dem Befehl:
lsmod
kannst du überprüfen welche module geladen sind. Jetzt noch überprüfen ob die Webcam erkannt wurde indem wir
dmesg
eigeben. Da sollte dann sowas stehen wie:
root@dave_yakumo:~# dmesg
Creating 5 MTD partitions on "Physically mapped flash":
0x00000000-0x00040000 : "cfe"
0x00040000-0x003f0000 : "linux"
0x000b5fec-0x00180000 : "rootfs"
mtd: partition "rootfs" doesn't start on an erase block boundary -- force read-only
0x003f0000-0x00400000 : "nvram"
0x00180000-0x003f0000 : "OpenWrt"
diag boardtype: 0000041a
Probing device eth0: No Robo switch in managed mode found
Probing device eth1: No Robo switch in managed mode found
Probing device eth2: No such device
Probing device eth3: No such device
BFL_ENETADM not set in boardflags. Use force=1 to ignore.
eth2: Broadcom BCM4320 802.11 Wireless Controller 3.90.37.0
usb.c: registered new driver usbdevfs
usb.c: registered new driver hub
usb-ohci.c: USB OHCI at membase 0xb8004000, IRQ 2
usb-ohci.c: usb-00:04.0, PCI device 14e4:4715
usb.c: new USB bus registered, assigned bus number 1
hub.c: USB hub found
hub.c: 2 ports detected
SCSI subsystem driver Revision: 1.00
Initializing USB Mass Storage driver...
usb.c: registered new driver usb-storage
USB Mass Storage support registered.
uhci.c: USB Universal Host Controller Interface driver v1.1
Linux video capture interface: v1.00
usb.c: registered new driver spca5xx
drivers/usb/spca5xx.c: spca5xx driver 00.57.07 registered
hub.c: new USB device 00:04.0-1, assigned address 2
drivers/usb/spca5xx.c: USB SPCA5XX camera found. Qtec Webcam 100 Pac207-BCA
drivers/usb/spca5xx.c: [spca5xx_probe:8380] Camera type GBRG
drivers/usb/pac207.h: [pac207_config:148] Find Sensor PAC207
drivers/usb/spca5xx.c: [spca5xx_getcapability:2207] maxw 352 maxh 288 minw 160 minh 120
interessant ist für uns eigentlich nur "Gerät erkannt"
usb.c: registered new driver spca5xx
drivers/usb/spca5xx.c: spca5xx driver 00.57.07 registered
hub.c: new USB device 00:04.0-1, assigned address 2
drivers/usb/spca5xx.c: USB SPCA5XX camera found. Qtec Webcam 100 Pac207-BCA
drivers/usb/spca5xx.c: [spca5xx_probe:8380] Camera type GBRG
drivers/usb/pac207.h: [pac207_config:148] Find Sensor PAC207
drivers/usb/spca5xx.c: [spca5xx_getcapability:2207] maxw 352 maxh 288 minw 160 minh 120
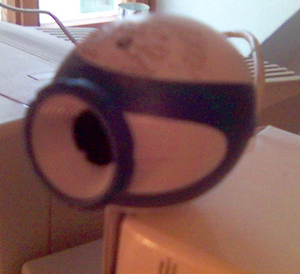
also Driver gefunden, Webcam erkannt. Und das mit der Aldi-Cam super!
| Programm spcacat | Programm motion |
|---|---|
|
Installation: cd /tmp wget http://ping02.stura.uni-weimar.de/dave/spcacat.gz mv spcacat.gz /usr/bin cd /usr/bin gunzip spcacat.gz chmod +x spcacat |
Installation: ipkg install http://ping02.stura.uni-weimar.de/dave/libjpeg_6b-1_mipsel.ipk ipkg install http://ping02.stura.uni-weimar.de/dave/motion_3.2.6-1_mipsel.ipk |
|
Alle möglichen Einstellungen stehen in der Hilfe spcacat -h spcacat [-h -d -g -f -s -p -N -P -o]
-h show this usage message.
-d device ask the driver to use specified video
output device (/dev/video1)
-o outputfile causes the program to output avi with
image data received from the video device to the specified file.
-g grab with READ method instead of default MMAP
-f video format nothing YUV420P fourcc I420
jpg JPEG fourcc MJPG
yuv YUV420P fourcc I420
r16 RGB565 16bits fourcc RGB2
r24 RGB 24bits fourcc RGB3
r32 RGB 32bits fourcc RGB4
-v RAW data fourcc RAWD
-s widthxheight ask the driver for input size
-p X take a picture every X seconds
-p X && -o getPicture every X seconds and record in SpcaPict.jpg
-N take N pictures and stop
-P parport device (spcacat, spcaserv)
jetzt Link noch legen, weil das Programm das device /dev/v4l/video0 nicht verarbeiten kann. und dann spcacat starten. ln -s /dev/v4l/video0 /dev/video0 spcacat -d /dev/video0 -g -f jpg -p 10000 -o > /dev/null & in unserm Falle speichert spcacat aller 10 sek. ein Bild namens SpcaPict.jpg ab. Eleganter ist es auch diesmal ein script zu erstellen um nicht jedesmal die Module von Hand zu laden. Dazu legt man in dem Startverzeichnis(/etc/init.d) eine Datei z.B. S98webcam an cd /etc/init.d/ vi S98webcam #!/bin/sh # Variablen Definition REAL="/www/bild.jpg" TEMP="/SpcaPict.jpg" insmod videodev sleep 2 insmod spca5xx sleep 30 # Link legen fuer Vidiodevice ln -s /dev/v4l/video0 /dev/video0 while true do spcacat -d /dev/video0 -g -f jpg -s 320x240 -p 1000 -o > /dev/null & sleep 5 killall spcacat killall -9 spcacat sleep 2 mv $TEMP $REAL sleep 15 done & berechtigungen noch setzen mit chmod 0777 S98webcam |
Nun noch die Config-Datei für motion anlegen. vi /etc/motion.conf #motion.conf daemon on quiet on # You may very well need to change this (check with 'dmesg' # after plugging in your webcam) videodevice /dev/v4l/video0 # Image size in pixels (valid range is camera dependent) width 320 height 240 quality 60 framerate 1 auto_brightness on # Initial brightness, contrast, hue (NTSC), and saturation # 0 = disabled (valid range 0-255) brightness 0 contrast 0 saturation 0 hue 0 # Target base directory for pictures and films # You should probably change this (create dir beforehand) target_dir /www jpeg_filename bild # Define a port number (e.g. 8000) to enable the mini-http server # 0 = disabled webcam_port 8000 # Set to 'off' to allow anybody (not just localhost) to view the # webcam via the mini-http server (http://hostname:port) webcam_localhost off webcam_quality 40 webcam_maxrate 2 # User defined text overlayed on each in the lower left corner text_left "Dave TV" Und jetzt motion starten mit motion Jetzt kann man sich den Stream unter http://IP-Adresse_vom_Router:8000 ansehen Eleganter ist es auch diesmal ein script zu erstellen um nicht jedesmal die Module von Hand zu laden. Dazu legt man in dem Startverzeichnis(/etc/init.d) eine Datei z.B. S98webcam an cd /etc/init.d/
vi S98webcam
#!/bin/sh
TIME="1800"
insmod videodev
sleep 5
insmod spca5xx
sleep 5
while true
do
motion
sleep $TIME
killall motion
killall -9 motion
sleep 2
done &
berechtigungen noch setzen mit chmod 0777 S98webcam |
- Projektseiten:
- http://mxhaard.free.fr/index.html - spca5xx Driver und Viewer
- http://www.lavrsen.dk/twiki/bin/view/Motion/WebHome - Motion Wiki
pwc/pwcx
ipkg install kmod-pwc
IDE-Festplatte
FTP-Server
ipkg install vsftpd
Samba-Server
ipkg install

