Dave's Web-Log: Unterschied zwischen den Versionen
| Zeile 1: | Zeile 1: | ||
| − | + | {{TOCRight}} | |
| − | |||
| − | |||
| − | |||
| − | + | ===Steuerbare-Webcam(logitech sphere) unter Win=== | |
| − | |||
| − | |||
| − | |||
| − | |||
| − | |||
* Logisphere-Programm --> [http://www.logisphere.org/en/index_html logisphere] | * Logisphere-Programm --> [http://www.logisphere.org/en/index_html logisphere] | ||
| Zeile 17: | Zeile 9: | ||
** Installation Windoofs typisch: next --> next --> Enter | ** Installation Windoofs typisch: next --> next --> Enter | ||
| − | + | ===Steuerbare-Webcam(logitech sphere) unter Linux(Ubuntu)=== | |
* Motion-Programm --> [http://www.lavrsen.dk/twiki/bin/view/Motion/WebHome Motion-Wiki] | * Motion-Programm --> [http://www.lavrsen.dk/twiki/bin/view/Motion/WebHome Motion-Wiki] | ||
| Zeile 295: | Zeile 287: | ||
* viel spass! | * viel spass! | ||
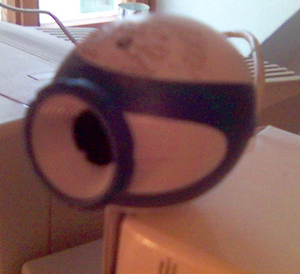
| − | + | ===Aldi-Webcam Qtec Webcam 100 Pac207-BCA installieren=== | |
[[Bild:Aldicam.png|thumb|Aldiwebcam DC-3110]] | [[Bild:Aldicam.png|thumb|Aldiwebcam DC-3110]] | ||
nachschauen was los ist :-) also in die console eintippen. | nachschauen was los ist :-) also in die console eintippen. | ||
| Zeile 350: | Zeile 342: | ||
Fertig! | Fertig! | ||
| + | ===Wiki-Vorlagen=== | ||
| + | * [[Vorlage:G23-server]] <-- Variable | ||
| + | * [[Vorlage:Link-Bild]] | ||
| + | |||
| + | |||
| + | [[Kategorie:Ideen]] | ||
[[Kategorie:Howto]] | [[Kategorie:Howto]] | ||
| + | [[Kategorie:ToDo]] | ||
Version vom 11. Februar 2007, 17:03 Uhr
Steuerbare-Webcam(logitech sphere) unter Win
- Logisphere-Programm --> logisphere
- easy to use programm
- nicht ganz billig (20 Euros)
- kostenlose Version mit Einschränkungen (Laufzeit 6 Stunden pro Tag)
- Installation Windoofs typisch: next --> next --> Enter
Steuerbare-Webcam(logitech sphere) unter Linux(Ubuntu)
- Motion-Programm --> Motion-Wiki
| benötigte Programme / Dateien | Befehle |
|---|---|
| gcc | apt-get install gcc |
| make | apt-get install make |
| module-assistant | apt-get install module-assistant |
| pwc - Webcamdriver | mit module-assistant in den Kernel kompilieren und installieren |
| apache2 | apt-get install apache2 |
php4
|
apt-get install php5
|
motion (mind.Version 3.2.1)
|
apt-get install motion |
| Cambozola Java-Applet runterladen und in /var/www kopieren | Link --> Cambozola |
Wie geht das von statten?
Als erstes mal die ganzen sachen installieren! Wenn schon die PWC-Driver für die kamera dabei sind, braucht ihr nicht noch die zu kompalieren. Dann kannst du ab dem apache2 anfangen zu installieren.
- Lege unter /var/www eine neue Datei an die livecam.htm heisst.
vi /var/www/livecam.htm
- Kopiere dir diesen Quelltext rein.
<html>
<head>
    <title>Webcam - Pan and Tilt</title>
</head>
<body text="#000000" bgcolor="#EEF0E0" link="#0000EE" vlink="#551A8B" alink="#FF0000">
    <center>
        <h2>Web Camera - Logitech Sphere - Pan and Tilt</h2>
        <applet code=com.charliemouse.cambozola.Viewer
            archive=cambozola.jar width=320 height=240>
            <param name=url value=http://Deine_IP_Adresse:8081>
        </applet>
    </center>
    <form name="pantilt" action="control204pt.php" method="post">
        <center>
            Click buttons below to rotate and tilt camera.<br>
            <INPUT TYPE=SUBMIT NAME="command" VALUE="Pan Left ">
            <INPUT TYPE=SUBMIT NAME="command" VALUE=" L5 ">
            <INPUT TYPE=SUBMIT NAME="command" VALUE=" L4 ">
            <INPUT TYPE=SUBMIT NAME="command" VALUE=" L3 ">
            <INPUT TYPE=SUBMIT NAME="command" VALUE=" L2 ">
            <INPUT TYPE=SUBMIT NAME="command" VALUE=" L1 ">
            <INPUT TYPE=SUBMIT NAME="command" VALUE="Center Pan">
            <INPUT TYPE=SUBMIT NAME="command" VALUE=" R1 ">
            <INPUT TYPE=SUBMIT NAME="command" VALUE=" R2 ">
            <INPUT TYPE=SUBMIT NAME="command" VALUE=" R3 ">
            <INPUT TYPE=SUBMIT NAME="command" VALUE=" R4 ">
            <INPUT TYPE=SUBMIT NAME="command" VALUE=" R5 ">
            <INPUT TYPE=SUBMIT NAME="command" VALUE="Pan Right"><br>
            <INPUT TYPE=SUBMIT NAME="command" VALUE="Tilt Down">
            <INPUT TYPE=SUBMIT NAME="command" VALUE=" D5 ">
            <INPUT TYPE=SUBMIT NAME="command" VALUE=" D4 ">
            <INPUT TYPE=SUBMIT NAME="command" VALUE=" D3 ">
            <INPUT TYPE=SUBMIT NAME="command" VALUE=" D2 ">
            <INPUT TYPE=SUBMIT NAME="command" VALUE=" D1 ">
            <INPUT TYPE=SUBMIT NAME="command" VALUE="Center Tilt">
            <INPUT TYPE=SUBMIT NAME="command" VALUE=" U1 ">
            <INPUT TYPE=SUBMIT NAME="command" VALUE=" U2 ">
            <INPUT TYPE=SUBMIT NAME="command" VALUE=" U3 ">
            <INPUT TYPE=SUBMIT NAME="command" VALUE=" U4 ">
            <INPUT TYPE=SUBMIT NAME="command" VALUE=" U5 ">
            <INPUT TYPE=SUBMIT NAME="command" VALUE=" Tilt Up "><br>
            <INPUT TYPE=SUBMIT NAME="command" VALUE="Calibrate">
        </center>
    </form>
</body>
</html>
- unter Deine_IP_Adresse müsst ihr natürlich eure IP eintragen
- als nächstes legen wir die Steuerungsdatei an mit
vi /var/www/control204pt.php
- und dann kopiere dir diesen Quelltext rein
<?
    Header("HTTP/1.0 204 No Content");

    $command = (IsSet($_REQUEST['command'])) ? $_REQUEST['command'] : "";

    switch ($command)
    {
        case " L5 ":
            readfile('http://username:password@localhost:8080/0/track/set?pan=-200&tilt=0');
            break;
        case " L4 ":
            readfile('http://username:password@localhost:8080/0/track/set?x=-60&y=1000');
            break;
        case " L3 ":
            readfile('http://username:password@localhost:8080/0/track/set?x=-45&y=1000');
            break;
        case " L2 ":
            readfile('http://username:password@localhost:8080/0/track/set?x=-30&y=1000');
            break;
        case " L1 ":
            readfile('http://username:password@localhost:8080/0/track/set?x=-15&y=1000');
            break;
        case "Center Pan":
            readfile('http://username:password@localhost:8080/0/track/set?x=0&y=1000');
            break;
        case " R1 ":
            readfile('http://username:password@localhost:8080/0/track/set?x=15&y=1000');
            break;
        case " R2 ":
            readfile('http://username:password@localhost:8080/0/track/set?x=30&y=1000');
            break;
        case " R3 ":
            readfile('http://username:password@localhost:8080/0/track/set?x=45&y=1000');
            break;
        case " R4 ":
            readfile('http://username:password@localhost:8080/0/track/set?x=60&y=1000');
            break;
        case " R5 ":
            readfile('http://username:password@localhost:8080/0/track/set?pan=200&tilt=0');
            break;
        case " U5 ":
            readfile('http://username:password@localhost:8080/0/track/set?pan=0&tilt=100');
            break;
        case " U4 ":
            readfile('http://username:password@localhost:8080/0/track/set?x=1000&y=20');
            break;
        case " U3 ":
            readfile('http://username:password@localhost:8080/0/track/set?x=1000&y=15');
            break;
        case " U2 ":
            readfile('http://username:password@localhost:8080/0/track/set?x=1000&y=10');
            break;
        case " U1 ":
            readfile('http://username:password@localhost:8080/0/track/set?x=1000&y=5');
            break;
        case "Center Tilt":
            readfile('http://username:password@localhost:8080/0/track/set?x=1000&y=0');
            break;
        case " D1 ":
            readfile('http://username:password@localhost:8080/0/track/set?x=1000&y=-5');
            break;
        case " D2 ":
            readfile('http://username:password@localhost:8080/0/track/set?x=1000&y=-10');
            break;
        case " D3 ":
            readfile('http://username:password@localhost:8080/0/track/set?x=1000&y=-15');
            break;
        case " D4 ":
            readfile('http://username:password@localhost:8080/0/track/set?x=1000&y=-20');
            break;
        case " D5 ":
            readfile('http://username:password@localhost:8080/0/track/set?pan=0&tilt=-100');
            break;
        case "Pan Left ":
            readfile('http://username:password@localhost:8080/0/track/set?pan=-10&tilt=0');
            break;
        case "Pan Right":
            readfile('http://username:password@localhost:8080/0/track/set?pan=10&tilt=0');
            break;
        case " Tilt Up ":
            readfile('http://username:password@localhost:8080/0/track/set?pan=0&tilt=5');
            break;
        case "Tilt Down":
            readfile('http://username:password@localhost:8080/0/track/set?pan=0&tilt=-5');
            break;
        case "Calibrate":
            readfile('http://username:password@localhost:8080/0/config/set?text_left=CAMERA%20CALIBRATING%20POSITION');
            readfile('http://username:password@localhost:8080/0/detection/pause');
            readfile('http://username:password@localhost:8080/0/track/set?x=-69&y=24');
            sleep(5);
            readfile('http://username:password@localhost:8080/0/track/set?x=69&y=-29');
            sleep(3);
            readfile('http://username:password@localhost:8080/0/track/set?x=65&y=-5');
            sleep(2);
            readfile('http://username:password@localhost:8080/0/config/set?text_left=CAMERA');
            readfile('http://username:password@localhost:8080/0/detection/start');
        default:
            break;
    }
?>
- danach noch die motion.conf datei bearbeiten (hier meine bsp.conf)
# Minimal motion example config file provided by the
# Debian motion package - for basic webcam operation.
#
# You most certainly want to investigate
# /usr/share/doc/motion/examples/motion-dist.conf.gz
# for further configuration options. Also, refer to the
# motion man page and /usr/share/doc/motion/motion_guide.html
# for detailed information on configuration options.

daemon on
quiet on

# You may very well need to change this (check with 'dmesg'
# after plugging in your webcam)
videodevice /dev/video0

# Image size in pixels (valid range is camera dependent)
width 320
height 240

framerate 2
quality 85
auto_brightness off

# Initial brightness, contrast, hue (NTSC), and saturation
# 0 = disabled (valid range 0-255)
brightness 0
contrast 0
saturation 0
hue 0

# Encode movies in real-time (install ffmpeg before enabling)
ffmpeg_cap_new off

# Target base directory for pictures and films
# You should probably change this (create dir beforehand)
target_dir /tmp
jpeg_filename bild

# Define a port number (e.g. 8000) to enable the mini-http server
# 0 = disabled
webcam_port 8081

# Set to 'off' to allow anybody (not just localhost) to view the
# webcam via the mini-http server (http://hostname:port)
webcam_localhost off

webcam_quality 50
webcam_maxrate 8

# Drivertyp der Steuerung
track_type 3

#Steuerungs-Port
control_port 8080

#Control html
control_html_output on

# user und pw
control_authentication
- die Dateien stammen alle von Kenneth Lavrsen und wurden leicht modifiziert
- viel spass!
Aldi-Webcam Qtec Webcam 100 Pac207-BCA installieren
nachschauen was los ist :-) also in die console eintippen.
dmesg
da sollte dann so etwas rausgespuckt werden:
drivers/media/video/spca5xx/spca5xx-main.c: USB SPCA5XX camera found. Qtec Webcam 100 Pac207-BCA
als nächstes überprüfen wir noch die usb-meldung
lsusb
da sollte dann so etwas rausgespuckt werden:
ID 093a:2460 Pixart Imaging, Inc.
nun zum driver installieren: 1. in das Verzeichnis wechseln und neusten driver runterladen mit
cd ~
wget http://mxhaard.free.fr/spca50x/Download/spca5xx-20060501.tar.gz
2. jetzt zu root werden und dann noch die nötigen pakete mit apt zum compilieren runterladen
sudo su
Password:xxxx
apt-get install linux-headers-`uname -r` linux-restricted-modules-`uname -r` build-essential
3. Dann den spca5xx Quellcode kompilieren. Das linux Material wird unter /usr/src angebracht. Folgende Befehle eingeben: ins Verzeichnis gehen, downgeloadete Quellakten verschieben, den Quellcode auspacken und dann ins Verzeichnis gehen.
cd /usr/src
mv ~/spca5xx-20060501.tar.gz .
tar xfvz spca5xx-20060501.tar.gz
cd spca5xx-20060501
4. Jetzt Variable CC setzen für das spca5xx makefile. In diesem Fall benutzt Ubuntu edgy Eft GCC 4.1 als Kernelcompiler
export CC=gcc-4.1
5. Einen Link zurück zu Quellcode setzen.
ln -s /usr/src/linux-headers-`uname -r` /lib/modules/`uname -r`/build
6. Jetzt den spca5xx Quellcode kompilieren, entfernen der alten Treiber, neuen Treiber laden und installieren. Die folgenden Befehle der reihe nach eingeben:
make
modprobe -r spca5xx
rm -rf /lib/modules/`uname -r`/kernel/drivers/usb/media/spca5xx*
make install
modprobe spca5xx
Fertig!
Wiki-Vorlagen
- Vorlage:G23-server <-- Variable
- Vorlage:Link-Bild

